K8ssandra includes Medusa for Apache Cassandra® to handle backup and restore for your Cassandra nodes. Recently Medusa was upgraded to introduce support for all S3 compatible backends, including MinIO, the popular k8s-native object storage suite. Let’s see how to set up K8ssandra and MinIO to backup Cassandra in just a few steps.

Deploy MinIO

Similar to K8ssandra, MinIO can be simply deployed through Helm.

First, add the MinIO repository to your local list:

Plain text
Copy to clipboard
Open code in new window
EnlighterJS 3 Syntax Highlighter
helm repo add minio https://helm.min.io/

The MinIO Helm charts allow you to do several things at once at install time:

  • Set the credentials to access MinIO
  • Create a bucket for your backups that can be set as default

You can create a k8ssandra-medusa bucket and use minio_key/minio_secret as the credentials, and deploy MinIO in a new namespace called minio by running the following command:

Plain text
Copy to clipboard
Open code in new window
EnlighterJS 3 Syntax Highlighter
helm install --set accessKey=minio_key,secretKey=minio_secret,defaultBucket.enabled=true,defaultBucket.name=k8ssandra-medusa minio minio/minio -n minio --create-namespace

Note: Creating the bucket is not mandatory at this stage and can be done through MinIO’s UI.

After the helm install command has completed, you should see something similar to this in the minio namespace:

Plain text
Copy to clipboard
Open code in new window
EnlighterJS 3 Syntax Highlighter
% kubectl get all -n minio
NAME READY STATUS RESTARTS AGE
pod/minio-5fd4dd687-gzr8j 1/1 Running 0 109s
NAME TYPE CLUSTER-IP EXTERNAL-IP PORT(S) AGE
service/minio ClusterIP 10.96.144.61 <none> 9000/TCP 109s
NAME READY UP-TO-DATE AVAILABLE AGE
deployment.apps/minio 1/1 1 1 109s
NAME DESIRED CURRENT READY AGE
replicaset.apps/minio-5fd4dd687 1 1 1 109s
% kubectl get all -n minio NAME READY STATUS RESTARTS AGE pod/minio-5fd4dd687-gzr8j 1/1 Running 0 109s NAME TYPE CLUSTER-IP EXTERNAL-IP PORT(S) AGE service/minio ClusterIP 10.96.144.61 <none> 9000/TCP 109s NAME READY UP-TO-DATE AVAILABLE AGE deployment.apps/minio 1/1 1 1 109s NAME DESIRED CURRENT READY AGE replicaset.apps/minio-5fd4dd687 1 1 1 109s
% kubectl get all -n minio
NAME                        READY   STATUS    RESTARTS   AGE
pod/minio-5fd4dd687-gzr8j   1/1     Running   0          109s

NAME            TYPE        CLUSTER-IP     EXTERNAL-IP   PORT(S)    AGE
service/minio   ClusterIP   10.96.144.61   <none>        9000/TCP   109s

NAME                    READY   UP-TO-DATE   AVAILABLE   AGE
deployment.apps/minio   1/1     1            1           109s

NAME                              DESIRED   CURRENT   READY   AGE
replicaset.apps/minio-5fd4dd687   1         1         1       109s

Using port forwarding, you can expose access to the MinIO UI in the browser on port 9000:

Plain text
Copy to clipboard
Open code in new window
EnlighterJS 3 Syntax Highlighter
% kubectl port-forward service/minio 9000 -n minio
Forwarding from 127.0.0.1:9000 -> 9000
Forwarding from [::1]:9000 -> 9000
% kubectl port-forward service/minio 9000 -n minio Forwarding from 127.0.0.1:9000 -> 9000 Forwarding from [::1]:9000 -> 9000
% kubectl port-forward service/minio 9000 -n minio
Forwarding from 127.0.0.1:9000 -> 9000
Forwarding from [::1]:9000 -> 9000

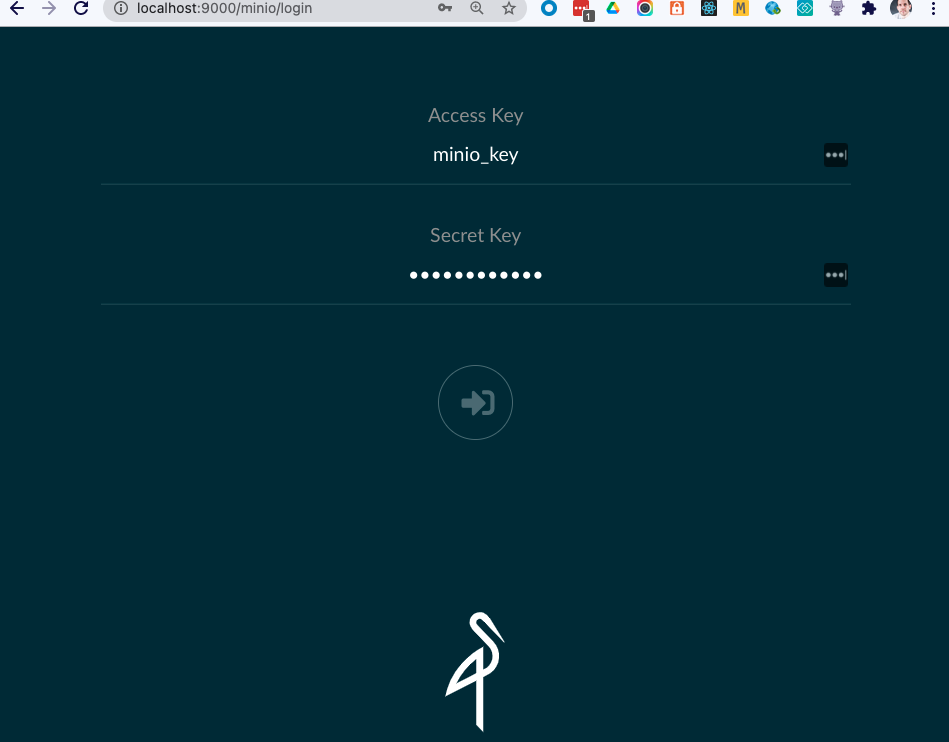
Now you can login to MinIO at http://localhost:9000 using your install time defined credentials (if you used the same commands above they would be minio_key and minio_secret):

MinIO login screen

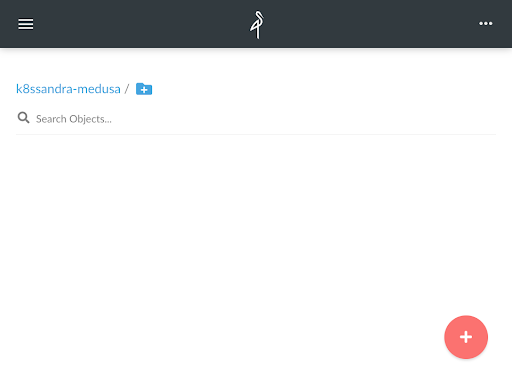
Once logged in, you can see that the k8ssandra-medusa bucket was created and is currently empty:

Empty MinIO bucket

Deploy K8ssandra

Now that MinIO is up and running, you can create a namespace for your K8ssandra installation and create a secret for Medusa to access the bucket. Create a medusa_secret.yaml file with the following content:

Plain text
Copy to clipboard
Open code in new window
EnlighterJS 3 Syntax Highlighter
apiVersion: v1
kind: Secret
metadata:
name: medusa-bucket-key
type: Opaque
stringData:
# Note that this currently has to be set to medusa_s3_credentials!
medusa_s3_credentials: |-
[default]
aws_access_key_id = minio_key
aws_secret_access_key = minio_secret
apiVersion: v1 kind: Secret metadata: name: medusa-bucket-key type: Opaque stringData: # Note that this currently has to be set to medusa_s3_credentials! medusa_s3_credentials: |- [default] aws_access_key_id = minio_key aws_secret_access_key = minio_secret
apiVersion: v1
kind: Secret
metadata:
 name: medusa-bucket-key
type: Opaque
stringData:
 # Note that this currently has to be set to medusa_s3_credentials!
 medusa_s3_credentials: |-
   [default]
   aws_access_key_id = minio_key
   aws_secret_access_key = minio_secret

Now create the k8ssandra namespace and the Medusa secret with the following commands:

Plain text
Copy to clipboard
Open code in new window
EnlighterJS 3 Syntax Highlighter
kubectl create namespace k8ssandra
kubectl apply -f medusa_secret.yaml -n k8ssandra
kubectl create namespace k8ssandra kubectl apply -f medusa_secret.yaml -n k8ssandra
kubectl create namespace k8ssandra
kubectl apply -f medusa_secret.yaml -n k8ssandra

You should now see the medusa-bucket-key secret in the k8ssandra namespace:

Plain text
Copy to clipboard
Open code in new window
EnlighterJS 3 Syntax Highlighter
% kubectl get secrets -n k8ssandra
NAME TYPE DATA AGE
default-token-twk5w kubernetes.io/service-account-token 3 4m49s
medusa-bucket-key Opaque 1 45s
% kubectl get secrets -n k8ssandra NAME TYPE DATA AGE default-token-twk5w kubernetes.io/service-account-token 3 4m49s medusa-bucket-key Opaque 1 45s
% kubectl get secrets -n k8ssandra
NAME                  TYPE                                  DATA   AGE
default-token-twk5w   kubernetes.io/service-account-token   3      4m49s
medusa-bucket-key     Opaque                                1      45s

You can then deploy K8ssandra with the following custom values file (all default values will be used if not customized here) :

Plain text
Copy to clipboard
Open code in new window
EnlighterJS 3 Syntax Highlighter
medusa:
enabled: true
storage: s3_compatible
storage_properties:
host: minio.minio.svc.cluster.local
port: 9000
secure: "False"
bucketName: k8ssandra-medusa
storageSecret: medusa-bucket-key
medusa: enabled: true storage: s3_compatible storage_properties: host: minio.minio.svc.cluster.local port: 9000 secure: "False" bucketName: k8ssandra-medusa storageSecret: medusa-bucket-key
medusa:
  enabled: true
  storage: s3_compatible
  storage_properties:
      host: minio.minio.svc.cluster.local
      port: 9000
      secure: "False"
  bucketName: k8ssandra-medusa
  storageSecret: medusa-bucket-key

Save the above file as k8ssandra_medusa_minio.yaml and then install K8ssandra with the following command:

Plain text
Copy to clipboard
Open code in new window
EnlighterJS 3 Syntax Highlighter
helm install k8ssandra k8ssandra/k8ssandra -f k8ssandra_medusa_minio.yaml -n k8ssandra

Now wait for the Cassandra cluster to be ready by using the following wait command:

Plain text
Copy to clipboard
Open code in new window
EnlighterJS 3 Syntax Highlighter
kubectl wait --for=condition=Ready cassandradatacenter/dc1 --timeout=900s -n k8ssandra

You should now see a list of pods similar to this:

Plain text
Copy to clipboard
Open code in new window
EnlighterJS 3 Syntax Highlighter
% kubectl get pods -n k8ssandra
NAME READY STATUS RESTARTS AGE
k8ssandra-cass-operator-547845459-dwg68 1/1 Running 0 6m36s
k8ssandra-dc1-default-sts-0 3/3 Running 0 5m56s
k8ssandra-dc1-stargate-776f88f945-p9twg 0/1 Running 0 6m36s
k8ssandra-grafana-75b9cb64cc-kndtc 2/2 Running 0 6m36s
k8ssandra-kube-prometheus-operator-5bdd97c666-qz5vv 1/1 Running 0 6m36s
k8ssandra-medusa-operator-d766d5b66-wjt7j 1/1 Running 0 6m36s
k8ssandra-reaper-5f9bbfc989-j59xk 1/1 Running 0 2m48s
k8ssandra-reaper-operator-858cd89bdd-7gfjj 1/1 Running 0 6m36s
k8ssandra-reaper-schema-4gshj 0/1 Completed 0 3m3s
prometheus-k8ssandra-kube-prometheus-prometheus-0 2/2 Running 1 6m32s
% kubectl get pods -n k8ssandra NAME READY STATUS RESTARTS AGE k8ssandra-cass-operator-547845459-dwg68 1/1 Running 0 6m36s k8ssandra-dc1-default-sts-0 3/3 Running 0 5m56s k8ssandra-dc1-stargate-776f88f945-p9twg 0/1 Running 0 6m36s k8ssandra-grafana-75b9cb64cc-kndtc 2/2 Running 0 6m36s k8ssandra-kube-prometheus-operator-5bdd97c666-qz5vv 1/1 Running 0 6m36s k8ssandra-medusa-operator-d766d5b66-wjt7j 1/1 Running 0 6m36s k8ssandra-reaper-5f9bbfc989-j59xk 1/1 Running 0 2m48s k8ssandra-reaper-operator-858cd89bdd-7gfjj 1/1 Running 0 6m36s k8ssandra-reaper-schema-4gshj 0/1 Completed 0 3m3s prometheus-k8ssandra-kube-prometheus-prometheus-0 2/2 Running 1 6m32s
% kubectl get pods -n k8ssandra
NAME                                                  READY   STATUS      RESTARTS   AGE
k8ssandra-cass-operator-547845459-dwg68               1/1     Running     0          6m36s
k8ssandra-dc1-default-sts-0                           3/3     Running     0          5m56s
k8ssandra-dc1-stargate-776f88f945-p9twg               0/1     Running     0          6m36s
k8ssandra-grafana-75b9cb64cc-kndtc                    2/2     Running     0          6m36s
k8ssandra-kube-prometheus-operator-5bdd97c666-qz5vv   1/1     Running     0          6m36s
k8ssandra-medusa-operator-d766d5b66-wjt7j             1/1     Running     0          6m36s
k8ssandra-reaper-5f9bbfc989-j59xk                     1/1     Running     0          2m48s
k8ssandra-reaper-operator-858cd89bdd-7gfjj            1/1     Running     0          6m36s
k8ssandra-reaper-schema-4gshj                         0/1     Completed   0          3m3s
prometheus-k8ssandra-kube-prometheus-prometheus-0     2/2     Running     1          6m32s

Create some data and back it up

Extract the username and password to access Cassandra (the password is different for each installation unless it is explicitly set at install time) into variables:

Plain text
Copy to clipboard
Open code in new window
EnlighterJS 3 Syntax Highlighter
% username=$(kubectl get secret k8ssandra-superuser -n k8ssandra -o jsonpath="{.data.username}" | base64 --decode)
% password=$(kubectl get secret k8ssandra-superuser -n k8ssandra -o jsonpath="{.data.password}" | base64 --decode)
% username=$(kubectl get secret k8ssandra-superuser -n k8ssandra -o jsonpath="{.data.username}" | base64 --decode) % password=$(kubectl get secret k8ssandra-superuser -n k8ssandra -o jsonpath="{.data.password}" | base64 --decode)
% username=$(kubectl get secret k8ssandra-superuser -n k8ssandra -o jsonpath="{.data.username}" | base64 --decode)
% password=$(kubectl get secret k8ssandra-superuser -n k8ssandra -o jsonpath="{.data.password}" | base64 --decode)

Connect through CQLSH on one of the nodes:

Plain text
Copy to clipboard
Open code in new window
EnlighterJS 3 Syntax Highlighter
% kubectl exec -it k8ssandra-dc1-default-sts-0 -n k8ssandra -c cassandra -- cqlsh -u $username -p $password

Copy/paste the following statements into the CQLSH prompt and press enter:

Plain text
Copy to clipboard
Open code in new window
EnlighterJS 3 Syntax Highlighter
CREATE KEYSPACE medusa_test WITH replication = {'class': 'SimpleStrategy', 'replication_factor': 1};
USE medusa_test;
CREATE TABLE users (email TEXT PRIMARY KEY, name TEXT, state TEXT);
INSERT INTO users (email, name, state) VALUES ('alice@example.com', 'Alice Smith', 'TX');
INSERT INTO users (email, name, state) VALUES ('bob@example.com', 'Bob Jones', 'VA');
INSERT INTO users (email, name, state) VALUES ('carol@example.com', 'Carol Jackson', 'CA');
INSERT INTO users (email, name, state) VALUES ('david@example.com', 'David Yang', 'NV');
CREATE KEYSPACE medusa_test WITH replication = {'class': 'SimpleStrategy', 'replication_factor': 1}; USE medusa_test; CREATE TABLE users (email TEXT PRIMARY KEY, name TEXT, state TEXT); INSERT INTO users (email, name, state) VALUES ('alice@example.com', 'Alice Smith', 'TX'); INSERT INTO users (email, name, state) VALUES ('bob@example.com', 'Bob Jones', 'VA'); INSERT INTO users (email, name, state) VALUES ('carol@example.com', 'Carol Jackson', 'CA'); INSERT INTO users (email, name, state) VALUES ('david@example.com', 'David Yang', 'NV');
CREATE KEYSPACE medusa_test  WITH replication = {'class': 'SimpleStrategy', 'replication_factor': 1};
USE medusa_test;
CREATE TABLE users (email TEXT PRIMARY KEY, name TEXT, state TEXT);
INSERT INTO users (email, name, state) VALUES ('alice@example.com', 'Alice Smith', 'TX');
INSERT INTO users (email, name, state) VALUES ('bob@example.com', 'Bob Jones', 'VA');
INSERT INTO users (email, name, state) VALUES ('carol@example.com', 'Carol Jackson', 'CA');
INSERT INTO users (email, name, state) VALUES ('david@example.com', 'David Yang', 'NV');

Check that the rows were properly inserted:

Plain text
Copy to clipboard
Open code in new window
EnlighterJS 3 Syntax Highlighter
SELECT * FROM medusa_test.users;
email | name | state
-------------------+---------------+-------
alice@example.com | Alice Smith | TX
bob@example.com | Bob Jones | VA
david@example.com | David Yang | NV
carol@example.com | Carol Jackson | CA
(4 rows)
SELECT * FROM medusa_test.users; email | name | state -------------------+---------------+------- alice@example.com | Alice Smith | TX bob@example.com | Bob Jones | VA david@example.com | David Yang | NV carol@example.com | Carol Jackson | CA (4 rows)
SELECT * FROM medusa_test.users;

 email             | name          | state
-------------------+---------------+-------
 alice@example.com |   Alice Smith |    TX
   bob@example.com |     Bob Jones |    VA
 david@example.com |    David Yang |    NV
 carol@example.com | Carol Jackson |    CA

(4 rows)

Now backup this data, and check that files get created in your MinIO bucket.

To that end, use the following command:

Plain text
Copy to clipboard
Open code in new window
EnlighterJS 3 Syntax Highlighter
helm install my-backup k8ssandra/backup -n k8ssandra --set name=backup1,cassandraDatacenter.name=dc1

Since the backup operation is asynchronous, you can monitor its completion by running the following command:

Plain text
Copy to clipboard
Open code in new window
EnlighterJS 3 Syntax Highlighter
kubectl get cassandrabackup backup1 -n k8ssandra -o jsonpath={.status.finishTime}

As long as this doesn’t output a date and time, then the backup is still running. With the amount of data present and the fact that you’re using a locally accessible backend, this should complete quickly.

Now refresh the MinIO UI and you should see some files in the k8ssandra-medusa bucket:

Medusa Cassandra backup in MinIO bucket

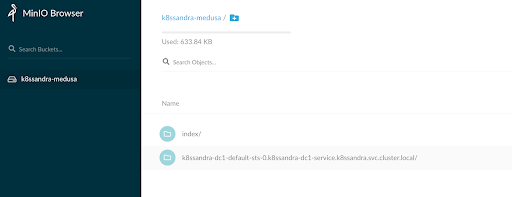
An index folder should appear (it is Medusa’s backup index) and then another folder that is specific to each Cassandra node in the cluster (in this case there is only one node).

Deleting the data and restoring the backup

TRUNCATE the table and verify it is empty:

Plain text
Copy to clipboard
Open code in new window
EnlighterJS 3 Syntax Highlighter
% kubectl exec -it k8ssandra-dc1-default-sts-0 -n k8ssandra -c cassandra -- cqlsh -u $username -p $password
TRUNCATE medusa_test.users;
SELECT * FROM medusa_test.users;
email | name | state
-------+------+-------
(0 rows)
% kubectl exec -it k8ssandra-dc1-default-sts-0 -n k8ssandra -c cassandra -- cqlsh -u $username -p $password TRUNCATE medusa_test.users; SELECT * FROM medusa_test.users; email | name | state -------+------+------- (0 rows)
% kubectl exec -it k8ssandra-dc1-default-sts-0 -n k8ssandra -c cassandra -- cqlsh -u $username -p $password

TRUNCATE medusa_test.users;

SELECT * FROM medusa_test.users;

 email | name | state
-------+------+-------


(0 rows)

Now restore the backup taken previously:

Plain text
Copy to clipboard
Open code in new window
EnlighterJS 3 Syntax Highlighter
helm install restore-test k8ssandra/restore --set name=restore-backup1,backup.name=backup1,cassandraDatacenter.name=dc1 -n k8ssandra

This operation will take a little longer as it requires to stop the StatefulSet pod and perform the restore as part of the init containers, before the Cassandra container can start. You can monitor progress using this command:

Plain text
Copy to clipboard
Open code in new window
EnlighterJS 3 Syntax Highlighter
watch -d kubectl get cassandrarestore restore-backup1 -o jsonpath={.status} -n k8ssandra

The restore operation is fully completed once the finishTime value appears in the output:

Plain text
Copy to clipboard
Open code in new window
EnlighterJS 3 Syntax Highlighter
{"finishTime":"2021-03-23T13:58:36Z","restoreKey":"83977399-44dd-4752-b4c4-407273f0339e","startTime":"2021-03-23T13:55:35Z"}

Check that you can read the data from the previously truncated table:

Plain text
Copy to clipboard
Open code in new window
EnlighterJS 3 Syntax Highlighter
% kubectl exec -it k8ssandra-dc1-default-sts-0 -n k8ssandra -c cassandra -- cqlsh -u k8ssandra-superuser -p XHsZ943WBg5RPNhVAT8x -e "SELECT * FROM medusa_test.users"
email | name | state
-------------------+---------------+-------
alice@example.com | Alice Smith | TX
bob@example.com | Bob Jones | VA
david@example.com | David Yang | NV
carol@example.com | Carol Jackson | CA
(4 rows)
% kubectl exec -it k8ssandra-dc1-default-sts-0 -n k8ssandra -c cassandra -- cqlsh -u k8ssandra-superuser -p XHsZ943WBg5RPNhVAT8x -e "SELECT * FROM medusa_test.users" email | name | state -------------------+---------------+------- alice@example.com | Alice Smith | TX bob@example.com | Bob Jones | VA david@example.com | David Yang | NV carol@example.com | Carol Jackson | CA (4 rows)
% kubectl exec -it k8ssandra-dc1-default-sts-0 -n k8ssandra -c cassandra -- cqlsh -u k8ssandra-superuser -p XHsZ943WBg5RPNhVAT8x -e "SELECT * FROM medusa_test.users"

 email             | name          | state
-------------------+---------------+-------
 alice@example.com |   Alice Smith |    TX
   bob@example.com |     Bob Jones |    VA
 david@example.com |    David Yang |    NV
 carol@example.com | Carol Jackson |    CA

(4 rows)

You’ve successfully restored your lost data in just a few commands!

Many backends available

MinIO, while being an obvious choice in the Kubernetes world, is not the only S3 compatible backend that K8ssandra can use. K8ssandra has supported AWS S3 and Google Cloud Storage as Medusa backends since 1.0.0. There are also a wide variety of solutions that can run on-prem (including CEPH, Cloudian, Riak S2, and Dell EMC ECS) or in cloud environments (including IBM Cloud Object Storage, and OVHcloud Object Storage). See the K8ssandra backup/restore documentation for more detailed instructions and let us know if you have questions, we love to help!